The sales area settings section defines the sales area name and specifies where associated POS devices are added. Sales areas are used throughout the system for reporting, promotions, and pricing.
Sales Area Settings Topics
Adding Sales Areas
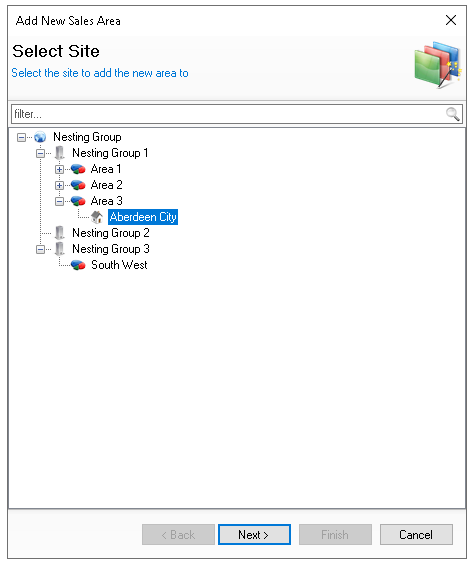
Follow these steps to add a sales area:
-
Click Add
-
Select Add New Sales Area
-
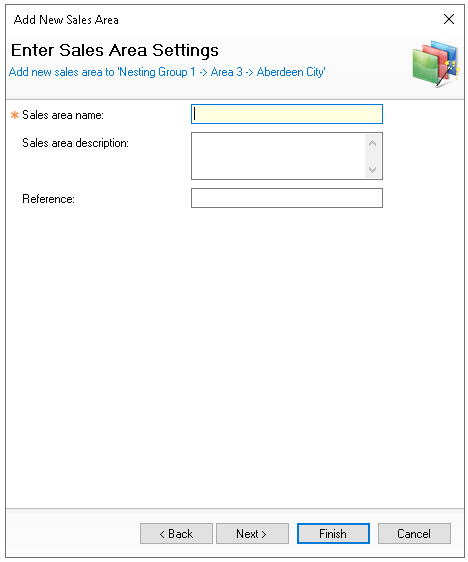
Expand the Estate Structure and select the required Site to add the sales area too | click Next
-
Enter the Sales Area Name, Description (optional), Reference (optional)
-
Click Finish
Clicking Next would enable proceeding to create POS, in this page only the sales area is going to be created, click here for more information on creating POS
Alternative Adding Process
-
From the Estate Structure tree right click on the Site
-
Select Add New Sales Area
-
Enter the Sales Area Details
Settings
When a sales area is selected the following table outlines each setting and its corresponding functionality.
| Setting | Description | Additional Information |
|---|---|---|
| Sales Area Details | ||
| Sales Area Name |
Name of the sales area |
|
| Sales Area Description |
Description of the sales area |
|
| Reference |
Reference of the sales area |
|
| CLM Prefix Group | ||
| Group Name |
The CLM Prefix Group defines any POS integrations that require a prefix, enabling the point of sale terminal to identify the correct integration based on the prefix provided |
For new sales areas this is left blank and is inherited from either estate details, or wherever it was selected at company, area or site |
| Location Tags | ||
| Tags |
Any created location tags will be displayed for selection at the sales area level |
|
| Queue Buster Configuration | ||
| Queue Buster |
Customer Specific Integration with Queue Buster |
|